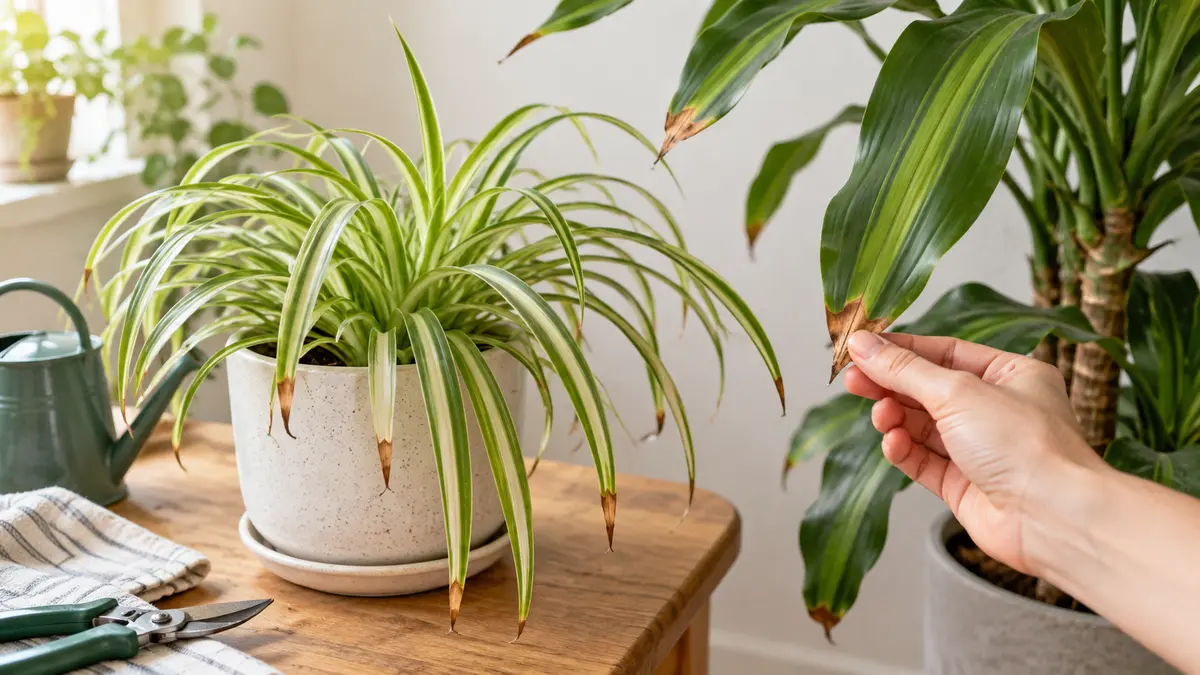
A brown tip on a houseplant leaf looks like a small problem with an obvious solution: give the plant more water. That reaction is understandable, but it can make the situation worse. A plant that has been allowed to dry too far may develop brown tips, yet a plant sitting in airless, wet potting mix can produce similar damage because injured roots cannot supply the leaf properly.
The useful question is not simply, “Why is this leaf brown?” It is, “What pattern is the plant showing, and what was happening around the roots when the damage formed?” Brown tissue will not turn green again. The goal is to identify the pressure behind it, correct that pressure, and judge the result by the next leaves rather than by the old scar.
Start With the Shape of the Damage
Before checking a humidity chart or changing the water source, look at the boundary between healthy and damaged tissue. Tip burn usually begins at the very end of the leaf and moves backward. Marginal burn travels along the sides. A circular or irregular spot in the middle of a leaf is a different pattern, while a soft brown patch surrounded by yellow tissue points toward a different process again.
| What you see | What to investigate first |
|---|---|
| Dry brown tissue limited to the tip | Watering consistency, fertilizer or mineral salts, low humidity |
| Several crisp tips and dry leaf margins | A prolonged dry interval, concentrated salts, hot air or intense light |
| Brown tip while the mix remains wet for many days | Root stress, poor drainage, an oversized pot or compacted mix |
| Pale speckling that becomes bronze or brown | Spider mites or another sap-feeding pest |
| Expanding spots with a halo or water-soaked edge | Leaf disease, physical injury or water remaining on sensitive foliage |
| One old leaf with a brown tip, while new growth is clean | Old damage or normal leaf aging rather than an active crisis |
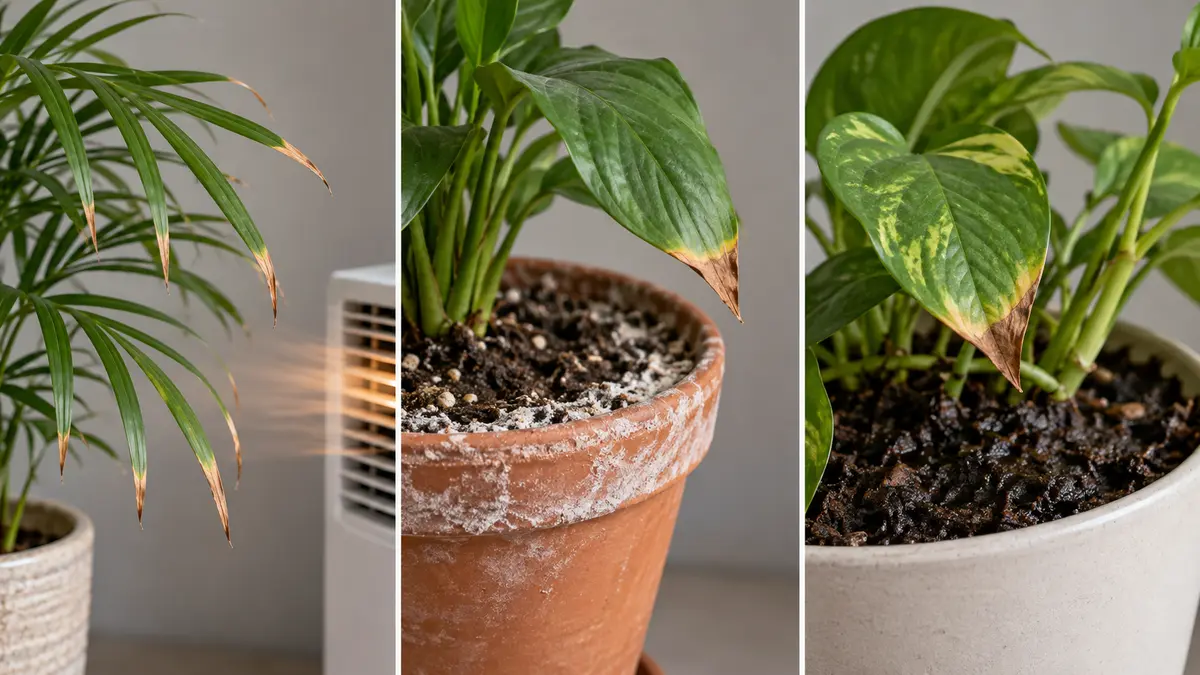
This pattern check prevents unrelated symptoms from being forced into one diagnosis. Brown tips are common, but “brown” is a description, not a cause.
A Ten-Minute Check Before You Change Anything
Begin at the pot. Push a clean wooden skewer several inches into the mix, feel through a drainage hole, or lift the container and compare its weight with the weight just after watering. The surface can be dry while the center remains wet. A moisture meter can add another clue, but it should not replace touch, pot weight and an understanding of how quickly this particular container normally dries.
Next, look for drainage and salt clues. Does the pot have an open drainage hole? Is water being left in a cachepot or saucer? Is there a pale crust on the mix, pot rim or drainage tray? Think back to the last two or three fertilizer applications, not only the last watering. Salts can accumulate gradually.
Then inspect the setting. A leaf may sit against a cold window at night, face a heater vent, receive a new beam of direct afternoon sun, or hang in the path of an air conditioner. Turn over several leaves and inspect the veins, petioles and growing points for insects, fine webbing, sticky residue or stippling. Finally, note whether the damage is limited to older foliage or is appearing on each new leaf.
Write down what you find before taking action. If you change the water, fertilizer, humidity, light and potting mix on the same day, you may never learn which factor mattered.
Cause 1: The Root Ball Dried Too Far
Leaf tips are at the end of the plant’s water-delivery system. When the root ball becomes very dry, the plant limits water loss and tissues farthest from the major veins can be among the first to die. The result is often a crisp point that advances inward if the dry period continues.
The important clue is the history of the entire root ball. A plant can be watered regularly and still experience dry pockets if water runs down a gap between a shrunken mix and the side of the pot. Peat-heavy media can become difficult to re-wet after severe drying. The top may look damp after a quick pour while the center remains nearly dry.
If the mix has pulled away from the pot, water slowly in several passes until the root ball is evenly moistened and excess water drains out. For a badly hydrophobic mix, standing the pot in shallow water for a short period can help it absorb moisture from below; remove it once the mix is evenly damp and let it drain fully. Do not leave it soaking indefinitely.
Going forward, use the plant’s drying rate rather than a fixed weekday. Plant size, light, temperature, root density and pot material all change that rate. PlantClinic’s guide to watering houseplants without a weekly schedule explains how to build a routine around observation instead of the calendar.
Cause 2: The Roots Stayed Wet Too Long
Brown tips do not always mean a dry plant. Roots need oxygen as well as water. When the center of a pot remains saturated for too long, fine roots can lose function or die. The leaves may then behave as though water is unavailable even though plenty is present in the container.
This is why watering solely because a tip looks dry is risky. If the mix is still wet several inches down, more water is not the immediate answer. Check whether the pot is much larger than the root system, whether a decorative cover pot is trapping runoff, and whether the mix has collapsed into a dense mass. Weak light and cool conditions can also slow water use enough to turn a previously workable routine into chronic wetness.
A mildly slow pot may only need better drainage, brighter appropriate light and more time between waterings. A plant that is wilting in wet mix, smelling sour, or developing soft dark tissue deserves a root inspection. Healthy roots are generally firm; severely rotted roots are soft and may lose their outer tissue when handled. Use the more detailed root-rot diagnosis and recovery guide if those signs are present.
Cause 3: Fertilizer or Mineral Salts Built Up
Fertilizer is made of soluble salts. Used at the correct concentration, those dissolved nutrients support growth. When the concentration around the roots becomes too high, however, roots have greater difficulty taking up water. Leaf tips and margins can dry even while the mix contains moisture.
Repeated small overdoses are not the only route to buildup. Fertilizing a very dry root ball, feeding a plant that is growing slowly in weak light, allowing every bit of water to evaporate without occasional drainage, or relying on mineral-rich water can all increase the dissolved-salt load. A white or gray crust is a useful clue, although its absence does not rule the problem out.
If the plant is otherwise healthy and the pot drains freely, a thorough irrigation with plain water can carry some accumulated salts out through the drainage holes. Empty the saucer afterward. Do not “flush” a container that is already waterlogged or lacks drainage, because adding more water creates a second problem. Severe buildup, damaged roots or badly degraded mix may justify repotting instead.
Resume fertilizer only when the plant is actively growing and use the label rate as an upper limit rather than a challenge. More fertilizer cannot compensate for poor light or unhealthy roots. The guide to fertilizing houseplants without root burn covers concentration, timing and the signs that feeding should pause.
Cause 4: The Water Source Does Not Suit a Sensitive Plant
Water quality receives a great deal of attention whenever a spider plant or Dracaena develops brown points. That suspicion can be reasonable. Iowa State University Extension identifies fluoride and chlorine in water as possible contributors to tip and edge injury in sensitive plants, including spider plants, Dracaena, prayer plants and Calathea.
It is still better to investigate than to assume. A plant may have tolerated the same water for years until a heavier fertilizer routine, irregular watering or a change in light increased its total stress. Hardness, alkalinity, sodium and treatment chemicals are different measurements; a single pH reading does not describe them all.
Check the annual water-quality report from your utility if one is available. If several sensitive plants repeatedly develop clean tip burn while less-sensitive plants remain unaffected, test one change over the next few leaves. Rainwater collected safely, reverse-osmosis water, or an appropriate low-mineral source can be useful for comparison. Keep the watering method, fertilizer and location stable during the test.
Do not acidify tap water merely because its pH looks high. The amount of bicarbonate and carbonate it carries—its alkalinity—has more influence on long-term root-zone pH than a snapshot pH number alone. PlantClinic’s explanation of tap-water pH versus alkalinity shows why those measurements should not be treated as interchangeable.
Cause 5: The Air Is Too Dry for the Plant
Low humidity can contribute to dry tips and margins, particularly on thin-leaved tropical plants. Warm indoor air passing over a leaf increases water loss, and a plant may not replace that water quickly enough at the outermost tissue. Heating vents can create a much drier microclimate than a humidity reading on the other side of the room suggests.
Humidity is also overdiagnosed. A brown tip does not prove that the room is dry, and increasing humidity will not repair roots damaged by wet soil or concentrated fertilizer. Place a basic hygrometer near the plant for several days and consider both humidity and temperature. A cooler, humid corner and a hot, dry shelf can exist in the same home.
For plants that genuinely need more humidity, a room humidifier with regular cleaning is more dependable than occasional misting. Grouping plants can modestly affect the immediate microclimate, but crowded foliage without air movement can keep leaves wet and favor disease. Aim for suitable humidity with gentle circulation, not stagnant tropical fog.
Cause 6: Heat, Direct Sun or a Cold Draft Injured the Leaf
Environmental injury can reach the tip first, but its pattern is often uneven. Hot air from a radiator or forced-air vent may dry the side facing the airflow. Intense direct light can produce bleached tan patches or crisp margins on the exposed side of the plant. A leaf touching cold glass can develop a sharply localized dark patch.
Consider what changed shortly before the damage appeared. The sun angle shifts through the year. A plant moved closer to a window may receive far more direct light than it did a week earlier, even though the room seems similar. Heating and cooling systems also create seasonal drafts that were absent when the plant was placed.
Move the plant far enough to remove the stress, but keep its species-specific light needs in mind. A dim corner may stop sun scorch while gradually weakening the plant. For help judging a real room rather than relying on a vague label, see how to identify indirect light indoors.
Brown Spots, Pest Damage and Tip Burn Are Not the Same
A clean, dry tip is more consistent with a cultural or environmental problem than with an active insect infestation. Spider mites typically create many tiny pale feeding marks. Those marks can merge into bronzed or brown tissue as damage progresses, and fine webbing may appear in heavier infestations. Scale, mealybugs and aphids can leave sticky honeydew rather than a simple dry point.
Leaf-spot problems often begin as separate lesions rather than as symmetrical tip burn. Their edges may be yellow, dark, water-soaked or expanding. Physical creases can also die back into brown scars. Check several leaves and both sides of each leaf before deciding that every brown mark has the same cause.
If the surface is finely stippled or you see webbing, use the paper-tap test described in the PlantClinic spider-mite guide. If a spot is spreading rapidly across multiple leaves, isolate the plant while you investigate and avoid splashing water from it onto the rest of the collection.
How to Trim a Brown Tip Without Harming the Leaf
Trimming is optional and cosmetic. It does not cure the cause, and the cut edge may eventually become slightly brown because cut cells are no longer living. Leave a narrow line of dry tissue instead of cutting deeply into green tissue.
Use clean, sharp scissors and follow the leaf’s natural outline. On a strap-shaped leaf, two angled cuts usually look more natural than a straight line. Clean the blades before moving to another plant, especially if any leaf has suspicious spots rather than simple dry tips.
Do not remove an entire leaf merely because its last centimeter is brown. The green portion is still photosynthesizing. Whole-leaf removal makes sense when most of the blade is dead, the leaf is diseased beyond saving, or the plant has enough healthy foliage that removal will not leave it severely stripped.
Change One Variable and Watch the New Growth
Old tip damage cannot reverse, so it is a poor scorecard for recovery. Mark the date of your care change and photograph the newest leaf. Over the following weeks, look for tips that remain green, a stable drying rhythm, firm roots and normal new growth.
If new leaves continue to burn, return to the evidence. A plant that now dries evenly but still develops tips may need a water-quality or fertilizer review. A plant whose pot remains wet far longer than expected needs a root-zone or light correction, not a humidifier. A plant with new stippling needs a pest check.
One isolated brown tip on an older leaf rarely justifies a rescue operation. Repeated damage on every new leaf does. That distinction can save a healthy plant from unnecessary repotting and prevent a stressed plant from receiving the one thing it does not need: another reflex watering.
Frequently Asked Questions
Should I cut the brown tips off my houseplant?
You can trim them for appearance, but trimming does not stop the cause. Use clean scissors, follow the original leaf shape and leave a very narrow brown margin so you do not cut farther into healthy tissue.
Do brown tips always mean low humidity?
No. Low humidity is one possible contributor, but inconsistent watering, wet-root damage, excess fertilizer salts, unsuitable water quality, heat and pests can all produce brown tissue. Check the root-zone moisture and the damage pattern before changing humidity.
Can overwatering cause brown leaf tips?
Yes, indirectly. Potting mix that stays saturated can deprive roots of oxygen and damage the fine roots responsible for water uptake. The foliage can then dry or wilt even though the pot is wet. Wet mix plus wilting, yellowing, a sour smell or soft roots deserves prompt investigation.
Will a brown leaf tip turn green again?
No. Once that tissue has died, it cannot become green. Successful treatment is shown by stable symptoms and healthy new leaves, not by a color change in the old tip.
Should I switch to distilled water?
Not automatically. First check watering, drainage and fertilizer use. For a plant known to be sensitive to water constituents, a controlled trial with rainwater, reverse-osmosis water or another suitable low-mineral source can help, but change only that variable and judge several new leaves.