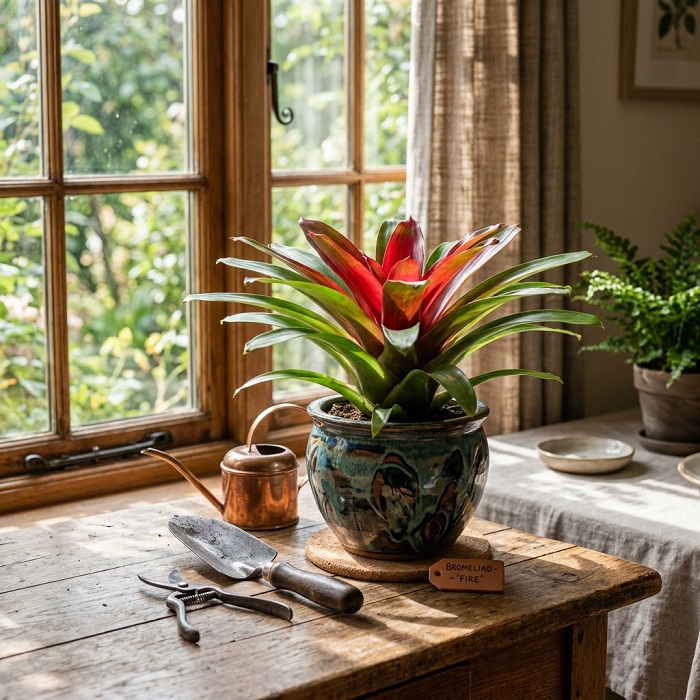
Learn how to care for bromeliad plants with easy tips on light, watering, soil, humidity, and pups. A beginner-friendly guide to keep them thriving.
Bromeliads are some of the easiest houseplants out there. Give them bright, indirect light, water the soil when the top half dries out, use a fast-draining mix, and keep them away from cold drafts. Skip the heavy feeding. That’s pretty much the whole game.
I killed my first bromeliad. Overwatered it, kept it in a dark corner, the whole disaster. So if you’re worried you’ll do the same, I get it. But here’s the good news: these plants are way more forgiving than most people think. Once you understand what they actually want, they kind of take care of themselves.
They also look incredible. Bright reds, hot pinks, striped foliage, weird spiky rosettes. A single one can make a plain room feel like something out of a rainforest. And they last. I’ve had one going strong for years now, well past the point I expected it to give up.
Below is everything I’ve picked up about keeping these things alive and looking good. No fluff, just what works.
The Bromeliad Backstory (Why It Matters)
Bromeliads belong to a huge plant family called Bromeliaceae. We’re talking around 3,700 species, which includes some surprising relatives like the pineapple and Spanish moss. Most of them come from the rainforests of Mexico, Central America, and South America.
Here’s the part that changes how you care for them. A lot of bromeliads are epiphytes. That means in the wild, they don’t grow in the ground at all. They cling to tree branches and bark, pulling water and nutrients straight from the air and rain. Their roots? Mostly just there to hold on.
So when you treat a bromeliad like a regular potted plant and keep the soil soggy, you’re basically doing the opposite of what nature intended. Keep that in the back of your mind. It explains almost every care tip that follows.
Getting the Light Right
Bright but indirect. That’s the sweet spot.
In the wild, these plants sit under a canopy where sunlight filters through leaves before it reaches them. So you want to mimic that. A spot near a south- or west-facing window works well, just not right up against the glass where the sun can scorch the leaves.
Too little light and the plant loses its color. Those gorgeous reds and pinks fade to a dull green, and it probably won’t flower. Too much direct sun and you’ll get burnt, crispy patches.
One thing worth knowing. Bromeliads with stiff, rigid leaves usually want more light than the ones with soft, floppy foliage. So if yours seems off, try moving it a bit and see how it responds over a couple of weeks.
Watering Without Drowning It
This is where most people mess up, me included.
The goal is simple. Keep the soil lightly moist, never soaking. A good rule I follow: water when the top half of the soil feels dry. In summer that’s roughly every one to two weeks. In winter, back off to every two or three weeks since the plant is barely growing.
Water the potting mix thoroughly, then let it drain all the way out. Never let the pot sit in a saucer of standing water. That’s a fast track to root rot.
Now, the cup. Most bromeliads have that central rosette that forms a little tank in the middle. In their native habitat it collects rainwater. You can keep it filled about a quarter to halfway with water, but honestly, indoors this gets tricky. In a dry room it can be fine. In low light or high humidity, a full cup can cause the center to rot out. If you do keep water in there, flush it out every month or so, because stagnant water gets gross and builds up bacteria.
One more thing. If your tap water is heavy on minerals and salt, your bromeliad might not love it. Rain, filtered, or distilled water is a safer bet. You’ll know it’s a problem if you start seeing crusty white buildup or damaged leaf tips.
Soil and Pots: It’s All About Drainage
Since these plants are used to gripping tree bark, they hate sitting in dense, wet soil. Regular potting mix straight from the bag holds too much water.
What works better is an orchid mix, or something you throw together yourself. I like a combo of cactus and succulent mix, some orchid bark, and a bit of compost. If you don’t want to fuss, one part peat-based mix and one part pine bark fines does the job too. The whole point is fast drainage and lots of air around the roots.
Pot size matters more than you’d think. Bromeliads have tiny root systems, so a small pot is usually right. Go too big and the extra soil just holds moisture the plant doesn’t want. Make sure whatever pot you use has drainage holes. Non-negotiable.
And you won’t be repotting often. Every four or five years is plenty, and when you do, only bump up one size. Spring through early fall is the best time for it.
The Temperature and Humidity Sweet Spot
Bromeliads are pretty chill about temperature. If your home feels comfortable to you, it’s comfortable to them. Roughly speaking, they like 70 to 90°F during the day and 50 to 70°F at night.
Here’s a small trick that helps with flowering. Try to give them at least a 10°F swing between day and night. That little dip seems to nudge them along.
Keep them away from drafts, though. Air conditioning vents, heaters, fireplaces, drafty doors, all of it. Sudden hot or cold blasts stress them out.
As for humidity, they’re tropical, so they like it on the moist side. But most will do fine in average household air. If your place runs really dry, especially in winter with the heat cranking, give them a mist a couple times a week. A pebble tray with water underneath the pot works too, and it’s less effort.
Feeding, But Just a Little
Bromeliads barely need fertilizer. Seriously. You can get away with feeding them almost nothing.
If you want to give them a boost, use a balanced houseplant fertilizer diluted way down, like an eighth of the normal strength. Feed once every two or three weeks, and only from spring through late summer. Skip it entirely in fall and winter.
The big warning here is overdoing it. Too much fertilizer causes salt damage and can ruin the color and shape of the plant. When in doubt, use less. These plants would rather be underfed than overfed.
What Happens After It Flowers (Meet the Pups)
This one surprises people. A bromeliad only flowers once in its life. After that gorgeous bloom fades, the mother plant slowly starts to die.
Don’t panic. It’s totally normal, and it’s not the end.
Before or just after the mother plant goes, it produces little offshoots at the base called pups. These are baby plants, and they’re your next generation. Once a pup gets to a decent size and has formed some roots of its own, you can gently separate it and pot it up on its own. Or just leave it attached and let it grow while you trim away the dead mother plant.
Fair warning on patience. A pup can take several years, sometimes around five, before it flowers itself. So this is a slow, long-game kind of reward. But it means one plant can basically keep going forever if you let it.
When Something Looks Off
Even easy plants have their moments. Here’s how to read the signs.
Brown or yellow leaf tips. Almost always dry air. Boost the humidity with misting or a pebble tray. The damaged tips won’t turn green again, so just trim them with clean scissors if they bug you.
No flowers. Usually a light problem, either too much or too little. Sometimes it’s a temperature thing, especially if the day and night temps never really change. And remember, young plants and fresh pups need years before they bloom, so it might just be a waiting game.
Pests. Watch for spider mites, mealybugs, scale, aphids, and thrips. Mealybugs come off with a cotton swab dipped in alcohol. Scale you can scrape off with your fingernail or a dull knife. For the softer sap-suckers, a wet soapy rag or some insecticidal soap does the trick. One important note: skip the neem and horticultural oils on bromeliads. They can clog up the plant and smother it.
And if you’ve got pets, good news. Bromeliads are non-toxic according to the ASPCA. My cat still tries to chew the leaves, so keep an eye on that anyway.
Growing Your Little Bromeliad Collection
Once you’ve got one thriving, it’s honestly hard to stop at one. Different types bring totally different vibes. Aechmea has stiff, dramatic rosettes. Guzmania gives you those loud red and orange blooms. Neoregelia is all about wild patterned foliage. And Billbergia is about as forgiving as it gets if you tend to forget about your plants.
The whole thing really comes down to a few habits. Bright indirect light, careful watering, fast-draining soil, and a light hand with the fertilizer. Nail those and your bromeliad will pretty much run itself.
Start with one. See how it goes. Then let the pups do the rest.